AI is transforming how businesses operate, from automating repetitive tasks to improving customer support and streamlining workflows. One of the most exciting developments is the rise of AI agents—systems that can understand goals, use tools, make decisions, and perform tasks with limited human intervention.
But how do you build an AI agent, and what tools do you need?
In this guide, we’ll explain how AI agents work, explore the tools required, and walk through the steps to build your first AI agent.
What Is an AI Agent?
An AI agent is a software system that uses an AI model to interpret information, decide what to do next, and take actions using available tools.
Unlike a traditional chatbot that mainly responds to questions, an AI agent can perform tasks such as retrieving information, updating a CRM, analyzing documents, or sending notifications.
For example, an AI sales agent could review incoming leads, research company information, summarize findings, and prepare follow-up messages for a sales representative.
Key Components of an AI Agent
Before building an AI agent, understand its main components:
- AI model: Processes information and helps determine the next action.
- Instructions: Define the agent’s role, goals, and boundaries.
- Tools: Allow the agent to interact with APIs, databases, and applications.
- Memory or context: Provides relevant information from the current task or previous interactions.
- Workflow logic: Controls the sequence of actions and decisions.
- Safety controls: Set permissions, validate outputs, and require human approval when necessary.
Together, these components enable an AI agent to perform useful tasks rather than simply generate text.
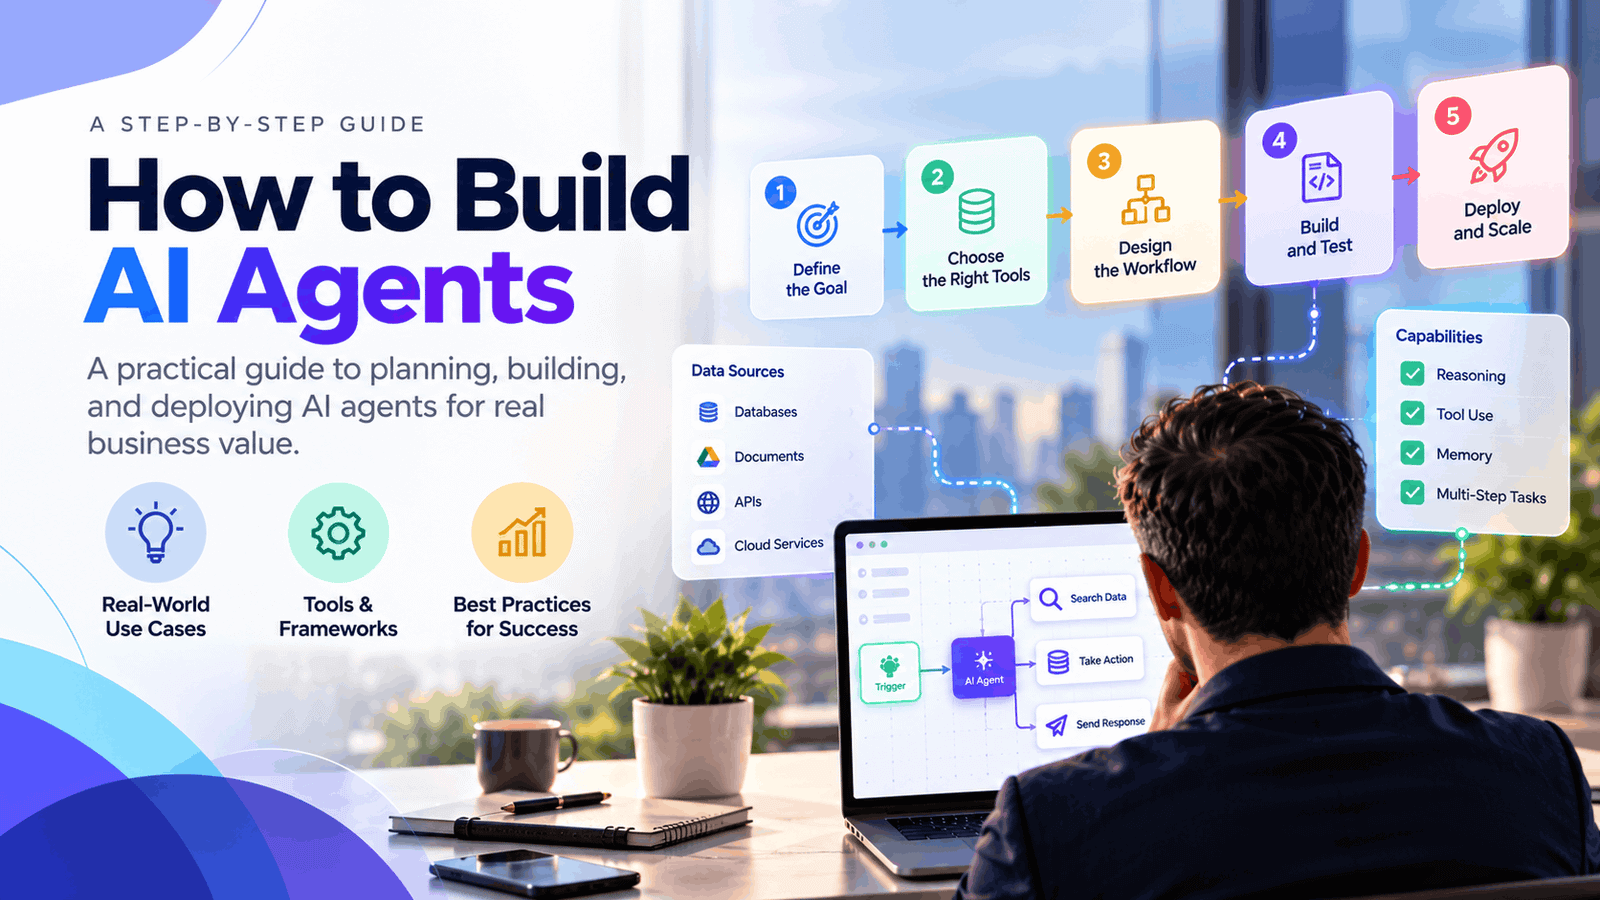
How to Build AI Agents Step by Step
Step 1: Define a Clear Goal
Start with one specific problem instead of trying to automate an entire business process.
Examples include:
- Answering frequently asked customer questions.
- Qualifying sales leads.
- Summarizing business documents.
- Categorizing support tickets.
- Extracting information from invoices.
Define what the agent should accomplish and how you’ll measure success, such as time saved, accuracy, or reduced manual work.
Step 2: Choose the Right AI Model
An AI model powers the agent’s reasoning and language understanding.
Depending on your requirements, you can explore models from providers such as OpenAI, Anthropic, and Google.
Consider the following factors when choosing a model:
- Accuracy and reasoning capabilities.
- Cost per request.
- Response speed.
- Support for tool calling.
- Privacy and data-handling requirements.
Start with a model that meets your needs rather than automatically choosing the most powerful or expensive option.
Step 3: Select an AI Agent Development Tool
You can build AI agents using no-code platforms, workflow automation tools, or custom code.
Popular options include:
- n8n: Useful for connecting AI models with APIs, databases, and business applications through visual workflows.
- Make: Suitable for visually designing AI-powered automation across multiple applications.
- Zapier: Helpful for integrating AI capabilities into everyday business workflows.
- LangChain: A development framework for building applications that use language models and tools.
- OpenAI API: Enables developers to create custom AI-powered applications and agent workflows.
Choose your platform based on technical skills, integration requirements, flexibility, and budget.
Step 4: Connect Tools and Data Sources
An agent becomes more useful when it can access the information and applications needed to complete its task.
Depending on the use case, you might connect:
- A CRM for customer information.
- A knowledge base for answering questions.
- An email platform for drafting or sending messages.
- A database for retrieving business records.
- External APIs for accessing real-time information.
Give the agent only the permissions it needs. Start with read-only access where possible, and require approval before sending external communications or making consequential changes.
Step 5: Build the Agent’s Workflow
Define how the agent should process a request and decide what action to take.
For example, a customer support agent could follow this workflow:
- Receive a customer question.
- Identify the topic and intent.
- Search the approved knowledge base.
- Generate an answer using relevant information.
- Check whether the answer meets defined requirements.
- Respond or escalate the request to a human.
Use clear instructions and explicit workflow rules. For high-risk tasks, avoid giving the agent unrestricted freedom to make decisions.
Step 6: Add Memory When Needed
Memory helps an agent retain useful context across steps or interactions.
For example, a sales agent might need to remember a lead’s industry, previous interactions, and current stage in the sales process.
Not every agent needs long-term memory. Many tasks work well with information provided during a single interaction. Add persistent memory only when it improves results, and establish appropriate data-retention and access policies.
Step 7: Test and Improve the Agent
Testing is essential before deploying an AI agent in a real business environment.
Test for:
- Incorrect or fabricated responses.
- Missing or outdated information.
- Tool failures and API errors.
- Unexpected or ambiguous requests.
- Unauthorized actions.
- Sensitive data exposure.
Measure the agent’s accuracy, completion rate, cost, and response time. Keep logs, define fallback behavior, and provide a way for users to report problems.
Example: Build a Simple AI Agent Using n8n
Suppose you want to create an AI agent that answers customer questions using your company’s knowledge base.
A basic n8n workflow could include:
- Trigger: Receive a question through a form or chat interface.
- AI model: Interpret the question and prepare a response.
- Knowledge retrieval: Search approved documents for relevant information.
- Response generation: Create an answer grounded in the retrieved content.
- Validation: Check whether sufficient information is available.
- Output: Return the answer or route the request to a human.
This approach combines AI with workflow automation, allowing the agent to interact with business systems rather than operate as an isolated chatbot.
For more advanced implementations, you can add authentication, retrieval-augmented generation (RAG), structured outputs, monitoring, and human approval steps.
Common Mistakes to Avoid When Building AI Agents
Avoid these common pitfalls:
- Starting too big: Begin with a narrow, measurable use case.
- Giving excessive permissions: Restrict access to necessary tools and data.
- Skipping testing: Evaluate real-world and unusual inputs before deployment.
- Ignoring costs: Monitor model usage, workflow executions, and infrastructure expenses.
- Overusing memory: Store only information that is useful and appropriate to retain.
- Removing human oversight too early: Keep human approval for sensitive or irreversible actions.
A reliable AI agent is not necessarily the most autonomous one. It is the one that completes its task consistently, safely, and efficiently.
Conclusion
Building AI agents involves more than selecting an AI model. You need a clear goal, suitable tools, relevant data, well-defined workflows, and effective safety controls.
For beginners, platforms such as n8n, Make, and Zapier provide accessible ways to connect AI with business applications. Developers can use frameworks and APIs to build more customized solutions.
Start with one practical use case, test it with realistic data, and improve it based on measurable results.
Looking to implement AI automation in your business? Profilent can help you identify automation opportunities and explore AI-powered solutions that improve productivity and streamline operations.